It is our first attempt to install the LED module on a scale model before production begins. We used the hand made engineer samples so it is slightly different than the production LED modules.
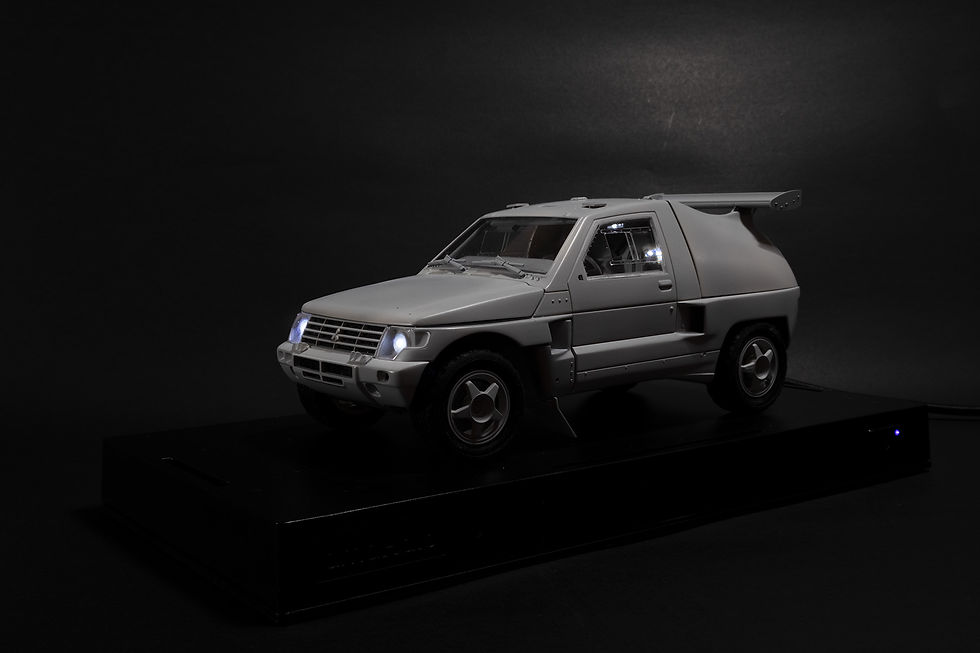
Scale model : 1/24 Mitsubishi Pajero 92 Paris Le Cap Winner
LED module : LM-54W (White) x 3
: LM-54R (Red) x 2
: LM-54Y (Yellow) x 2

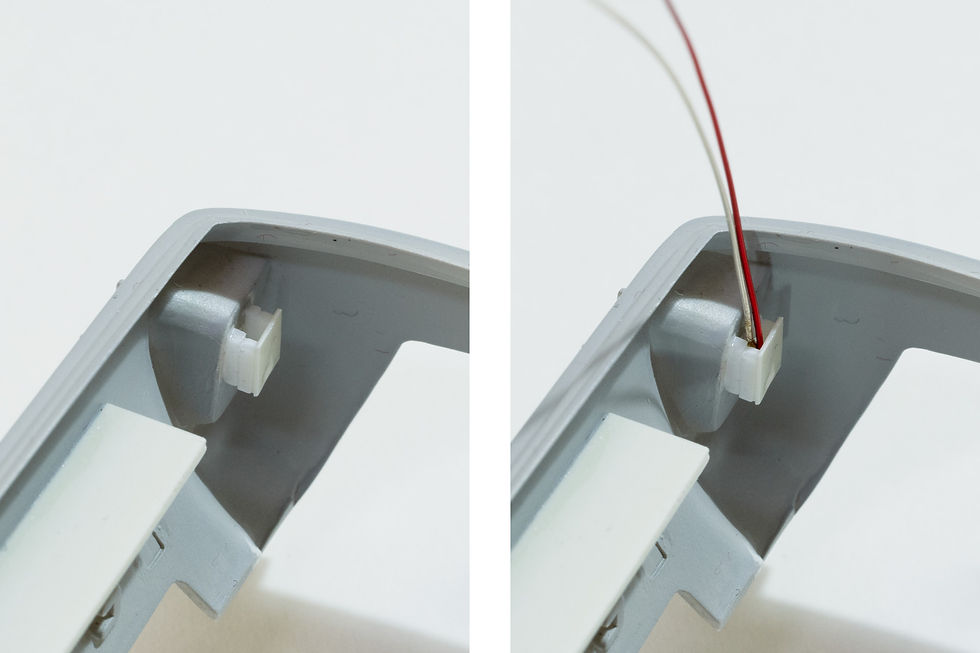
01 Back panel light
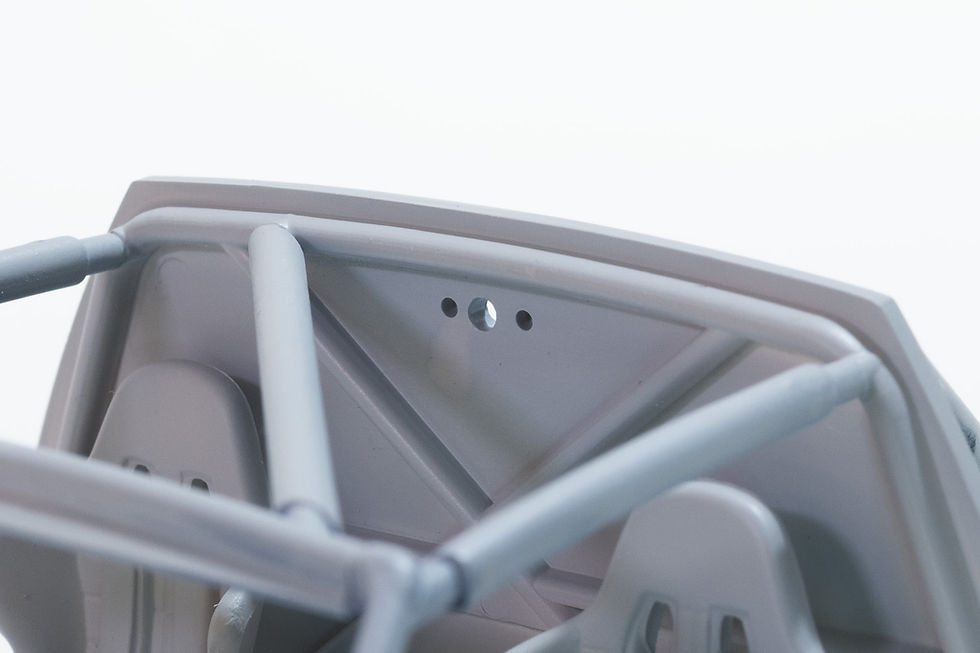
Drill a 1.5 mm hole at the lamp location on the back panel and place the LED module at the back of the panel.

Insert the 1.5 mm light guide (bundled in the package) to direct the light from the LED to the front of the panel. Compare the results with and without a light guide.
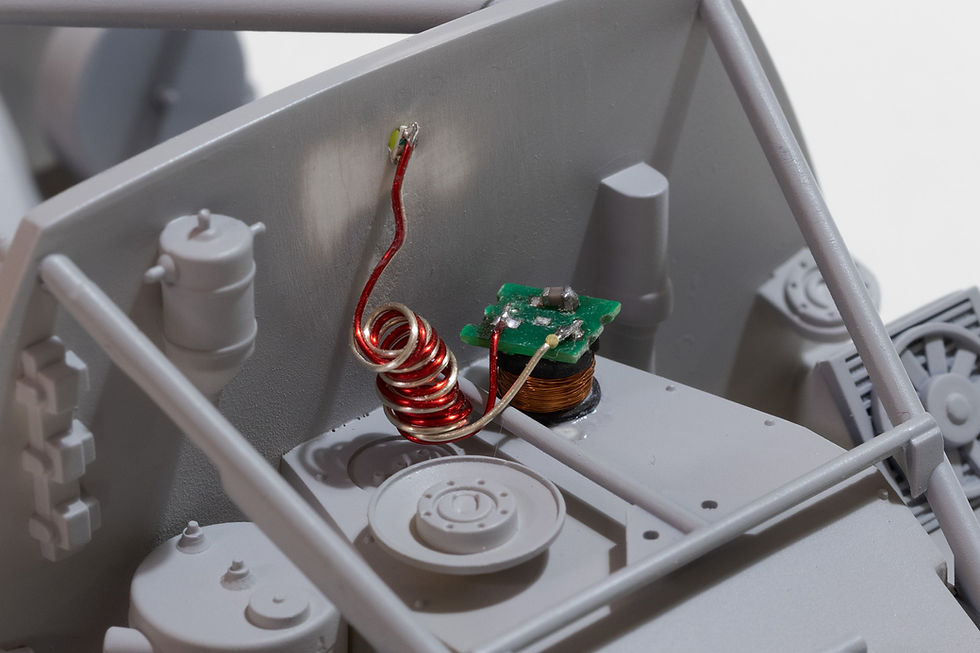
Fix the module body with superglue and arrange the excessive wire in a spiral shape.

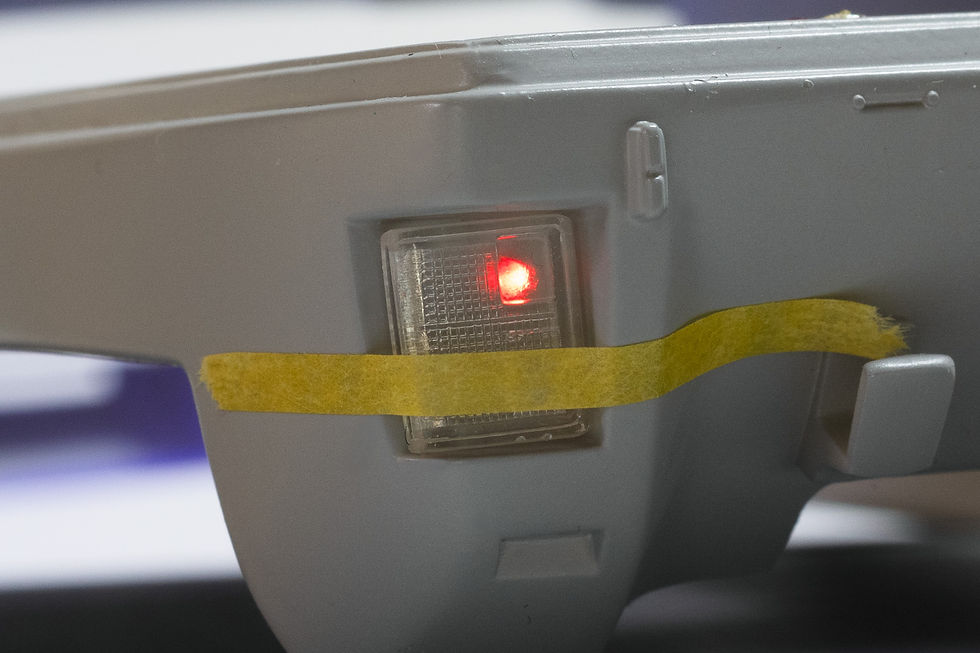
Cover the LED with black tape to avoid light leakage.

You can test the result anytime by simply putting it on the display case.
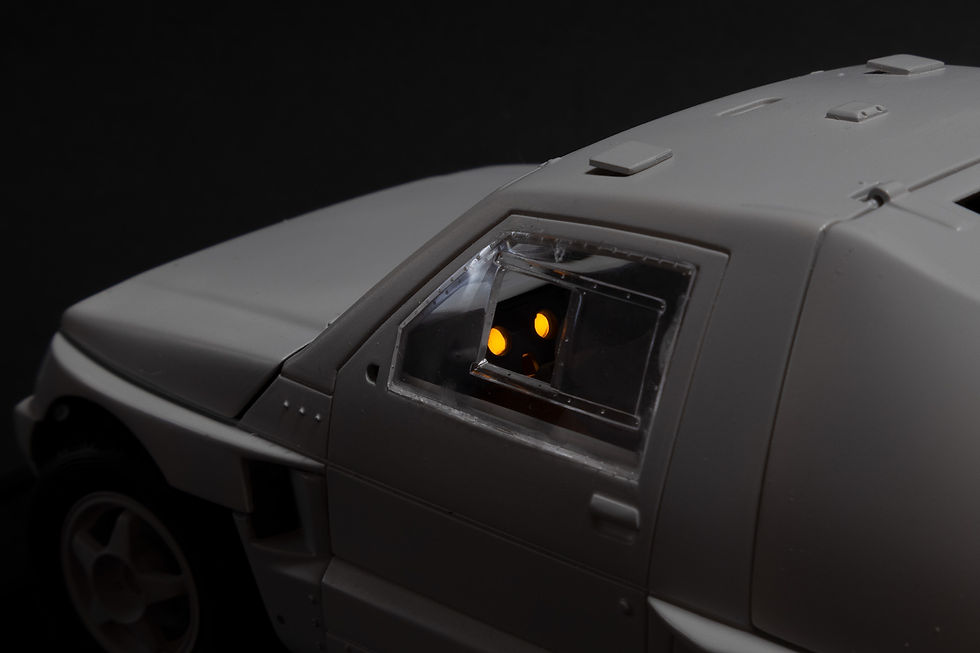
02 Dashboard lights

Drill the holes on the dashboard.

Use a thin plastic sheet (0.3 mm) to cover the back side of the dashboard.

Mounting two yellow LED modules and adjusting the LED direction to the dashboard hole. To ensure the light is distributed evenly, reserve some distance between the LED and the plastic sheet. Besides, make sure the module's coil is placed in parallel with the display case coil to achieve the best efficiency. It doesn't matter if you place the module body upside down.

Again, test the result by putting the dashboard on the display case at any time.
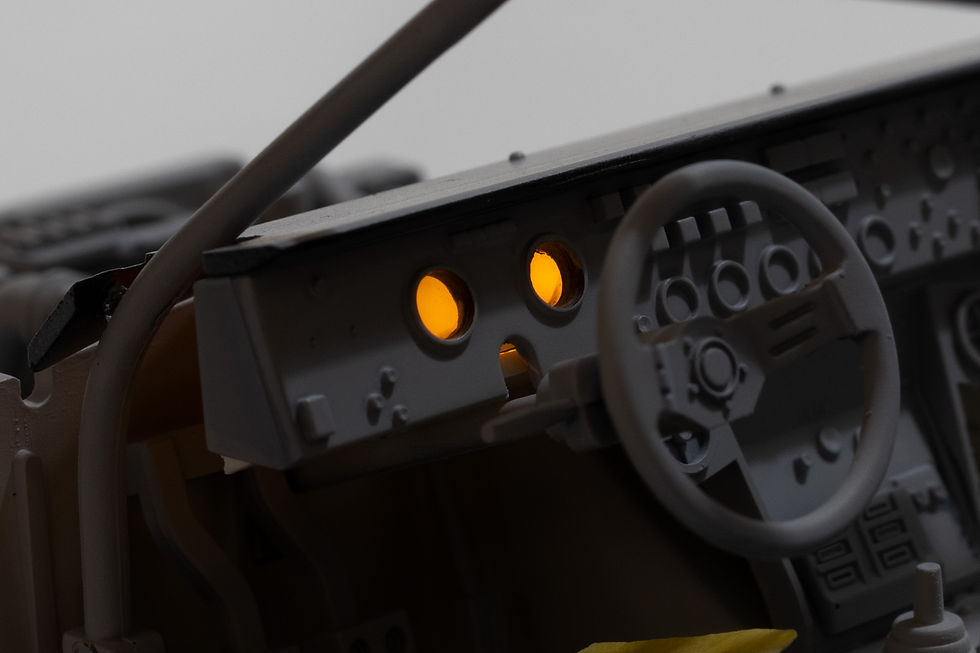
Test after dashboard assembly.
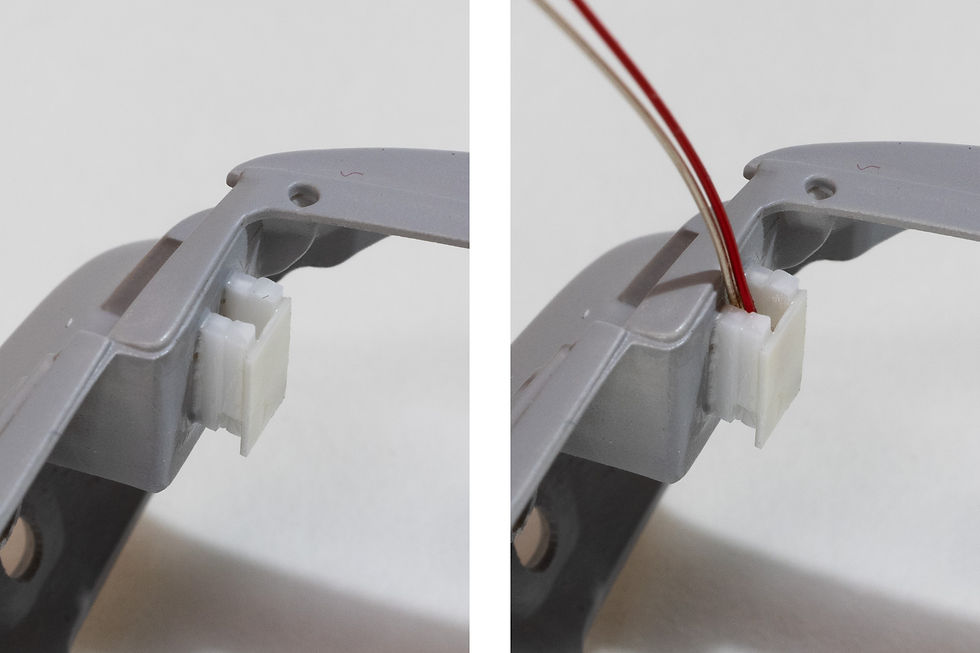
03 Tail lights
Drill a 1 mm hole on both sides of the tail light.
To hold the LED in the right position and in the right direction, build a pocket (~1.5 mm in width and 3 mm in length) with plastic stripes at the back of the tail light.

Paint the pocket black to avoid light leakage. Then build a platform and fix the module body on it. It will keep the module coil in parallel with the display case coil.

Insert the 1 mm light guide (bundled with the package) into the drilled hole and test the result.
Test fit the transparent cover and see the result.
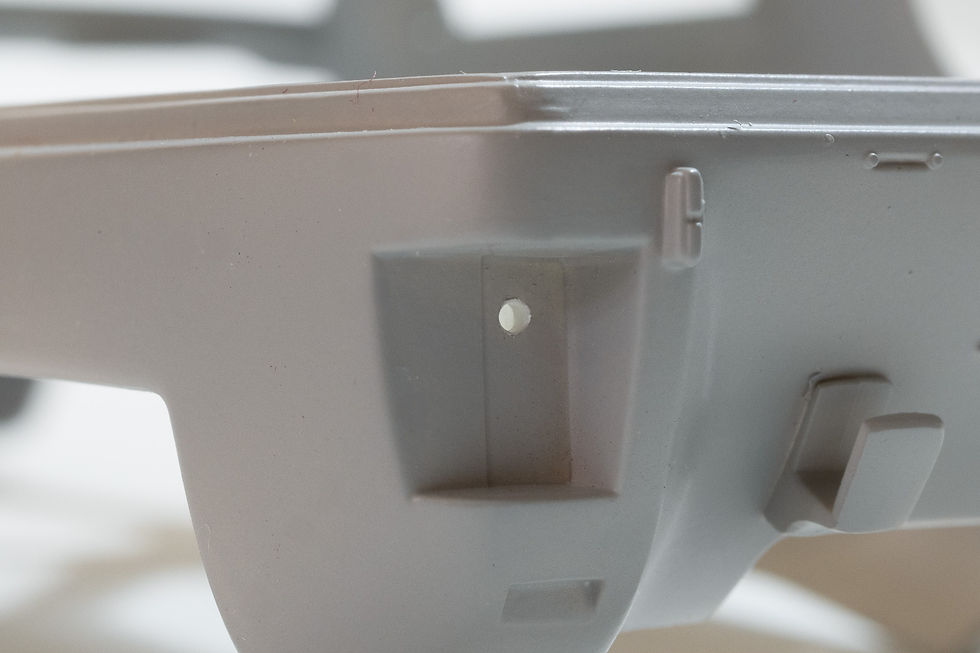
04 Head lights

Drill a 1.5 mm hole on both sides of head lights.
Same as the tali lights, build a pocket with plastic stripes at the back of the head lights.
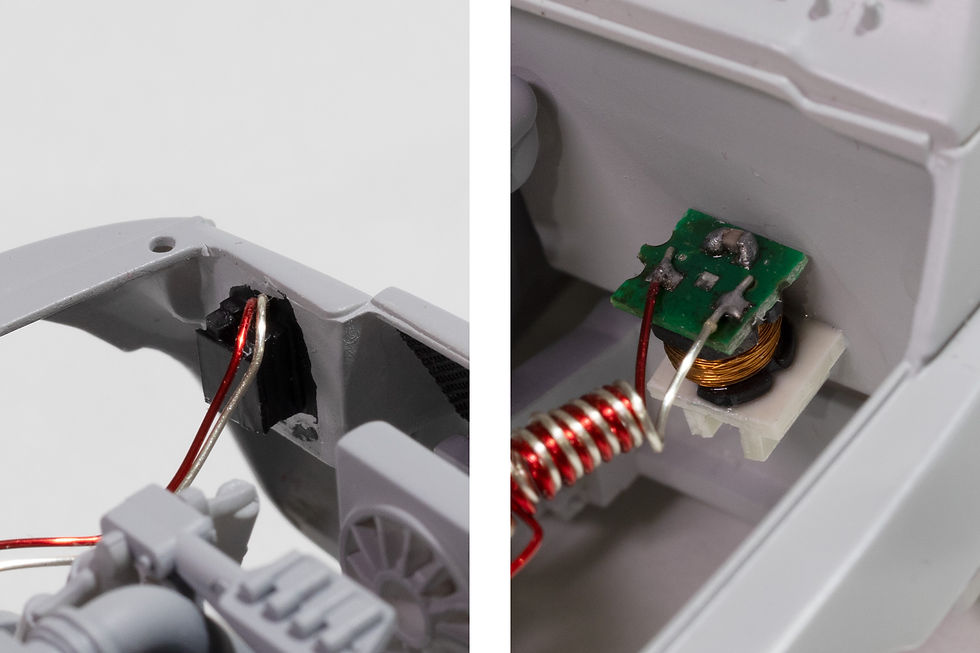
Paint the pocket black to avoid light leakage. There is no room to hold the module bodies at the front part of the engine room, so I put them in the back and built a platform to hold them upright.
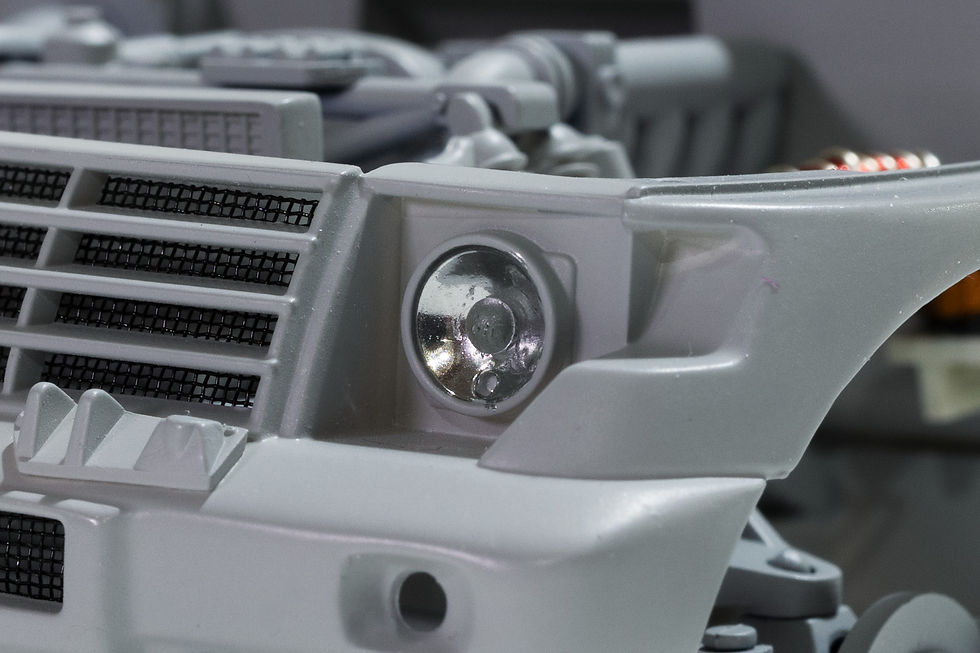
To improve the light reflection, paint the head light a chrome color. Insert the 1.5-mm light guide to bring the light from the LED to the front.
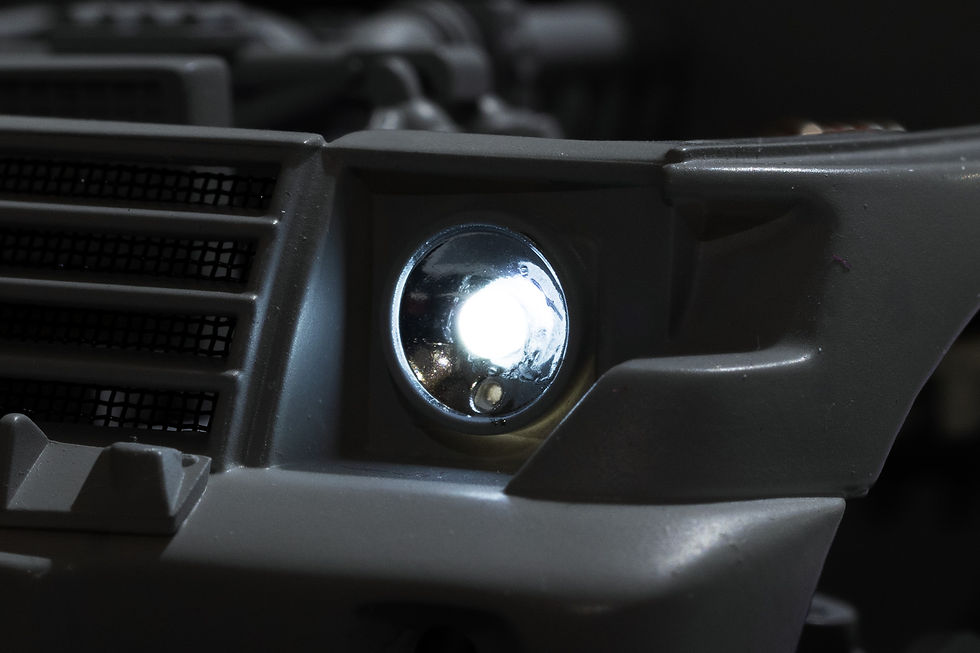
Testing the result.
05 Summary
It's a fun build, as the Pajero is large enough to install more LED modules (7 in total) and test different implementation methods. Firstly, the light guides are helpful to bring the light from the back of the plastic to the front. On the other hand, the 1.5 mm light guides have better efficiency than the 1.0 mm. However, the 1.0 mm light guide is closer to the actual size of a light bulb in scale. So, the choice is up to you.
When space is allowed, building a pocket is helpful to install the LED in the right position and at the right angle. It makes the assembly easier. You can first fix the module body in place and rearrange the excessive wire, then finally insert the LED into the pocket at the last step. (even after spray painting)
I hope this demo will help and give you some inspiration. There are no fixed rules for installing the LED module. Creativity is always the key. Have fun and happy modeling!


Comments